Cavity Wall Insulation Installation
When it comes to cavity wall insulation installation, InsulGuard Cavity Shield is the only non-invasive cavity wall product available in Australia. Traditionally, products such as Supafil, Rockwool and foam wall insulations require drilling into the wall. Typically, these products would drill into the external brickwork along the mortar line roughly every 1.2m to cavity fill the wall. These holes can vary in size, from 25mm to 60mm in certain applications.
Drilling into the brickwork can create numerous problems for the home;
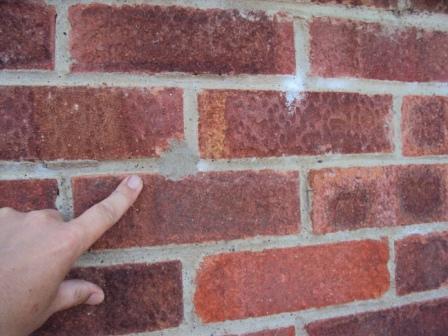
Moisture Penetration – When cavity wall insulation is installed through drilling into the brickwork, the entry points used for the installation can also be an entry point for moisture. Even when the cavity wall insulation installation points are repaired with mortar, they do not bond with the existing mortar or do not penetrate the full depth of the brick. This means that rising damp and moisture can penetrate the external wall.
How Cavity Shield is Installed
Unlike other products, Cavity Shield cavity wall insulation is installed via the top of the brickwork. This means that there is no drilling into your brickwork, so the problems of visible holes and moisture penetration associated with other products are not issues. We access the top of the cavity through either the external roof or the internal roof. For Colorbond or tin roofs, we normally lift up the bottom corner of every third sheet, allowing us to place our pipework inside the cavity. For tiled roofs, it’s as simple as removing the odd tile every 3-5m or where there is a corner, doorway or floor length window.
As Cavity Shield is a loose bead product, it’s important that all preparatory work is completed before pumping commences. Every hole and defect is exposed through the pumping process, so it’s important that we block up possible leak points prior to installation. These commonly include silicone around windows and doors, replacing gas vents with our fine mesh vent, behind split system air conditioners and roller shutters. Most of our installs are completed with a follow up appointment to make sure there has been no leaks detected.
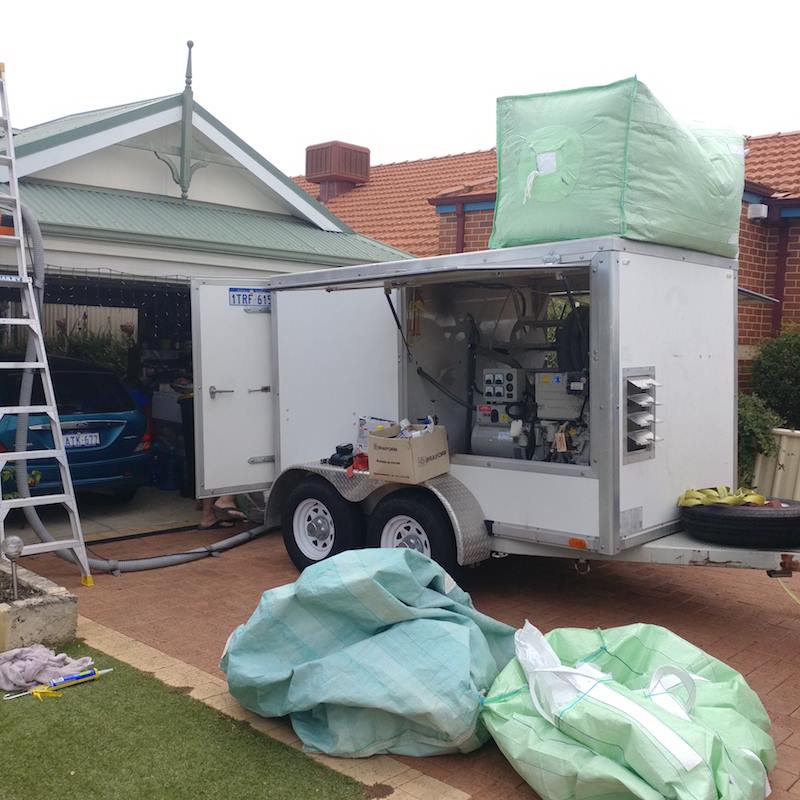
As the bead is pumped under extreme pressure, it fills every part of the double brick cavity. It wraps around windows, doors and corners due to the high flow properties of the bead. This is why we can claim to be the ONLY CAVITY WALL INSULATION PRODUCT WITH 100% COVERAGE.
To learn more about the installation process, check out our installation video below.
Contact the experts at InsulGuard for an obligation free quote on 1300 467 854 or by filling out the below form.
You may also be interested in:
Wall Insulation
Underfloor Insulation
Roof Insulation
Insulation Removal